

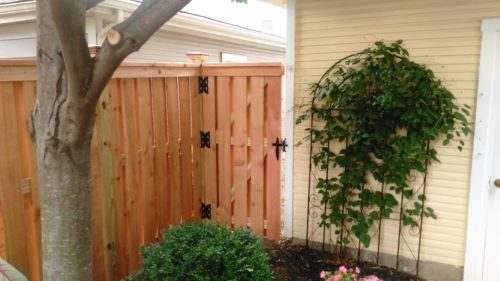
Pickets for privacy fences are usually a golden yellow to orange shade, depending on the type of wood, but that warm color quickly fades to a dull gray if the fence isn’t sealed with stain or sealer to prevent damage from sun and exposure to moisture. Whether you neglected to seal your fence upon installation or inherited a gray fence, you can strip away those thin layers of gray to reveal the vibrant wood. The wood fades back to gray after a few years even with a protective sealant, so you’ll have to repeat the process to maintain the fence.
- Remove all lawn ornaments and debris from in front of the fence. Mow the lawn if the grass height blocks access to the bottom of the fence. Tie back plants that lean in front of the fence.
- Scrub the fence with a wood cleaning detergent or a 20-percent solution of chlorine bleach that contains 1 part bleach and 4 parts water. Spray the fence with a garden hose and use a long-handled scrub brush to scrub the pickets from top to bottom, paying particular attention to the mold, mildew and algae. Apply the solution conservatively to avoid runoff into the soil. Rinse the fence after about five minutes. You don’t need to use bleach or detergent at all, but they can help to brighten wood. Bleach is especially effective to use when killing mold, mildew and algae.
- Attach a 25-degree angle tip to a power washer that emits water at a rate of 1,500 to 2,000 pounds per square inch. The amount of pressure increases as the angle of the tip decreases. A 25-degree angle is mildly aggressive and better suited for beginners, but you can try a smaller, more-aggressive tip if you have experience with a power washer.
- Power-wash the fence to slough off the gray wood surface. Stand about 18 inches back from the fence to start and slowly work your way to within about 12 inches of the fence. Begin spraying at one end or corner of the fence and spray individual fence pickets from top to bottom. Spray slowly to give the water enough time to strip the wood; it may take a few passes to completely strip away the gray layer, especially when using a 25-degree spray tip. Maintain an even speed as you work your way around the fence. Wait several hours, up to one day, for the wood to dry thoroughly.
- Apply a generous coat of exterior oil stain, water-sealing product or a similar wood preservative, to the first few feet of the fence. Use a roller cover with a medium nap.
- Brush the wood preservative into the wood, using a wide paintbrush, which also removes runs and ensures the preservative is applied evenly to the crack between fence pickets.
- Continue applying the wood preservative to 3-foot sections of fence and brushing in the wet product until you complete the entire fence. Go back over tight spaces with a small paintbrush or paint roller.
Things You Will Need
- Wood detergent or bleach
- Bucket
- Scrub brush
- Power (pressure) washer
- 25-degree angle power-washing tip
- Wood stain or sealer
- Paint roller
- Medium-nap roller cover
- Wide paintbrush
- Small paintbrush
Tip
If you choose to use a wood detergent, your local home improvement store likely has several different types. Some are diluted in water and applied with a scrub brush, while others are added to a reservoir in the power washer and sprayed on the fence using a lower-pressure, wider-angle spray tip.